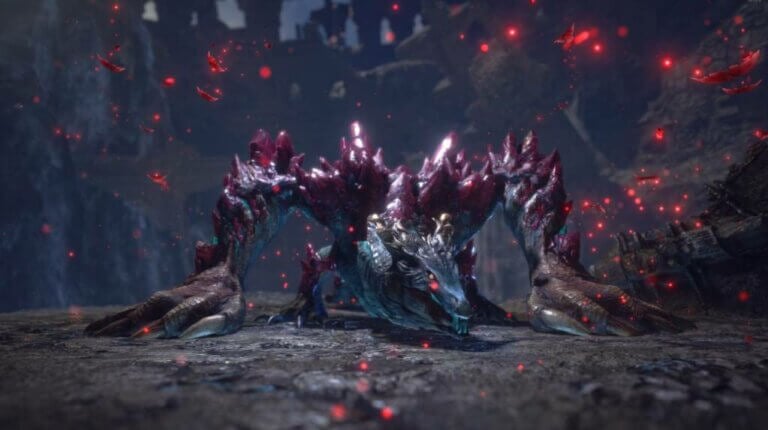
In Monster Hunter Rise Sunbreak (MHR Sunbreak), players get to fight the gargantuan Gaismagorm as the last boss in the story. Get to know how to beat this monster, loots, weaknesses, and more using this guide.
This guide is a work in progress and will be updated as soon as new information is available.
As the final boss of the story, Gaismagorm provides a lot of spectacle during your fight with it. The fight is split into two phases and each one has its own different strategies and tactics. Make sure to don your best armor sets (preferrably with resistance against Dragon) and bring weapons with either Thunder or Dragon elements.
In the first round of your fight against Gaismagorm, concentrate on hitting its weak spots: the head, both of the large arms (wing arms), and the tip of the tail. Be wary of the attacks and either get in close or move away during its large body attacks. Also, it’s highly unlikely for you to break parts here so just keep on damaging it until the battle moves to the next phase.
When dealing damage against Gaismagorm, you probably noticed that red crystals fall off of it. After receiving sufficient damage, Gaismagorm positions itself near the ledge and spawns rock walls. Use these walls to hide as Gaismagorm will then start pulling exposed hunters. Note that it is not able to pull bombs during this attack and there is no need to crouch when positioned behind the walls.
Use what you have learned and frequently take advantage of the positioning provided by the Wirebugs. Use them to evade the large sweeps and to get yourself out of harms way. While you can shield against most of Gaismagorm’s attacks, it can still be quite devastating and your weapon’s sharpness might suffer.
True to both phases, do not get up immediately if you find yourself hit by one of Gaismagorm’s large attacks. As it usually attacks twice, getting up as soon as you can result to you fainting here. Wait for a few seconds till the coast is clear before you press that button to get up. Once up, heal or get out of the hot zone using your Wirebug.
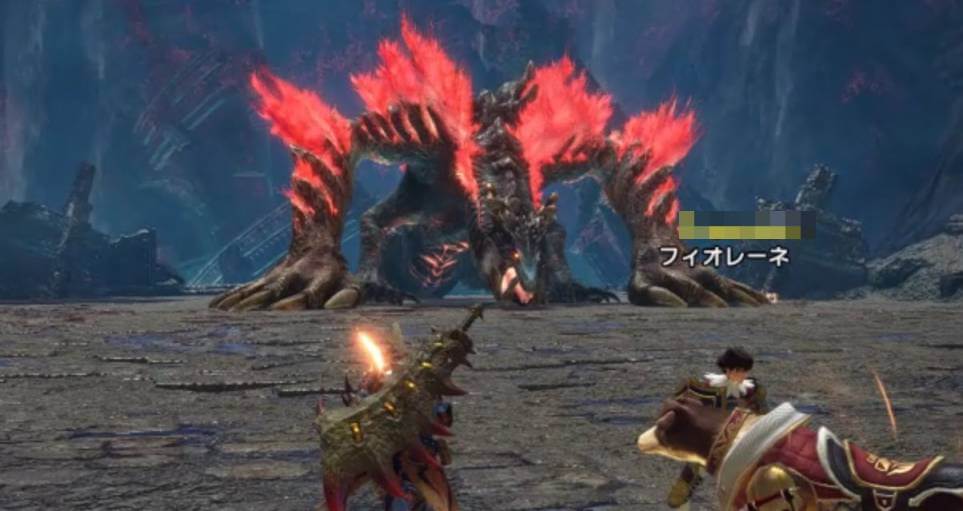
Although large and damaging, the second form of Gaismagorm has attacks that can easily be read. The ground around it turns red when it prepares to use projectiles and its breath attack. Its area attacks are large but you do get indicators on where it will direct its attacks. You’ll likely have more than enough time to get out of harm’s way once you see this especially if you use your Wirebug.
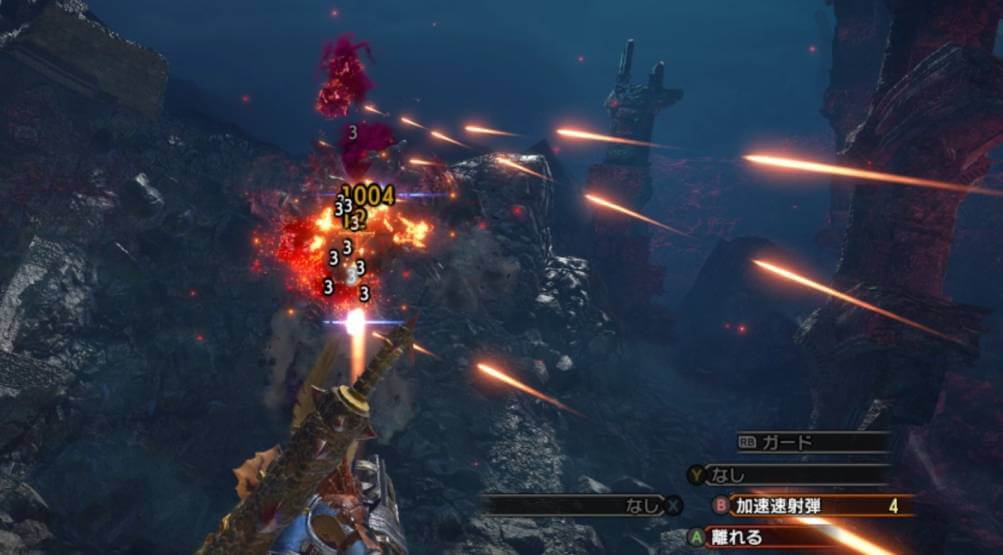
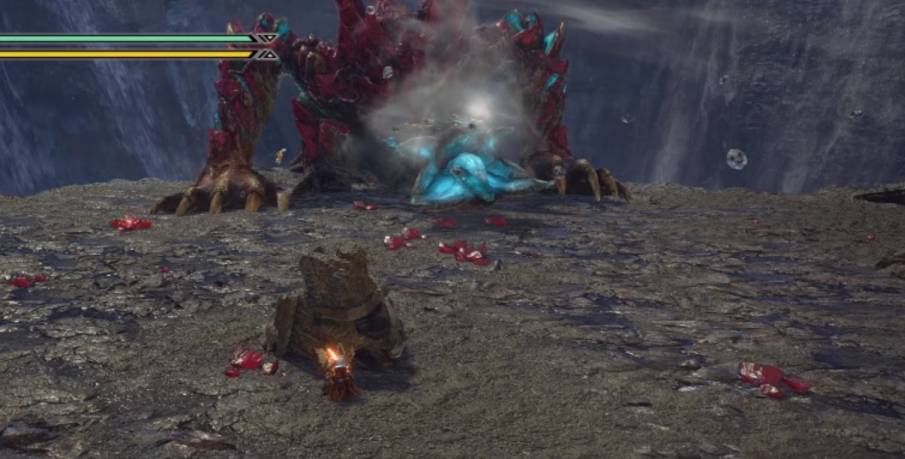
After receiving enough damage, Ballistae will be sent to help you in your fight. Once Gaismagorm starts climbing the walls, use the Ballistae and blast the orbs on its back. Popping one deals a lot of damage so it’s best to concentrate only on one. Once Gaismagorm reaches the top and starts turning red, two things can happen: you succeed on taking it down or you fail. If you succeed, Gaismagorm will throw itself down to the ground, leaving it open for a few seconds. If you fail, immediately leave the Gatling Gun and run back until you leave the red-colored ground. Wait for it to blast the area first before you relaunch your attack.

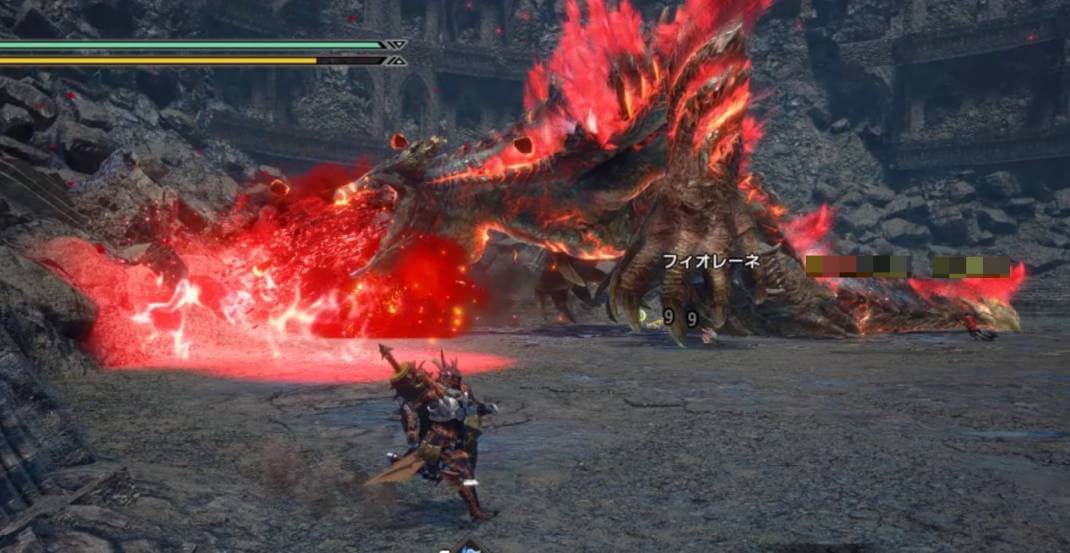
In this phase, you can finally start breaking and severing Gaismagorm’s body parts. Hit the two large wing arms until you see its nails break. You can also cut off the tail part of Gaismagorm which is lootable twice.
Gaismagorm is weak against both Dragon and Thunder elements. Be sure to bring these weapon elements during your fight with it. Also, it is somewhat weak against fire.
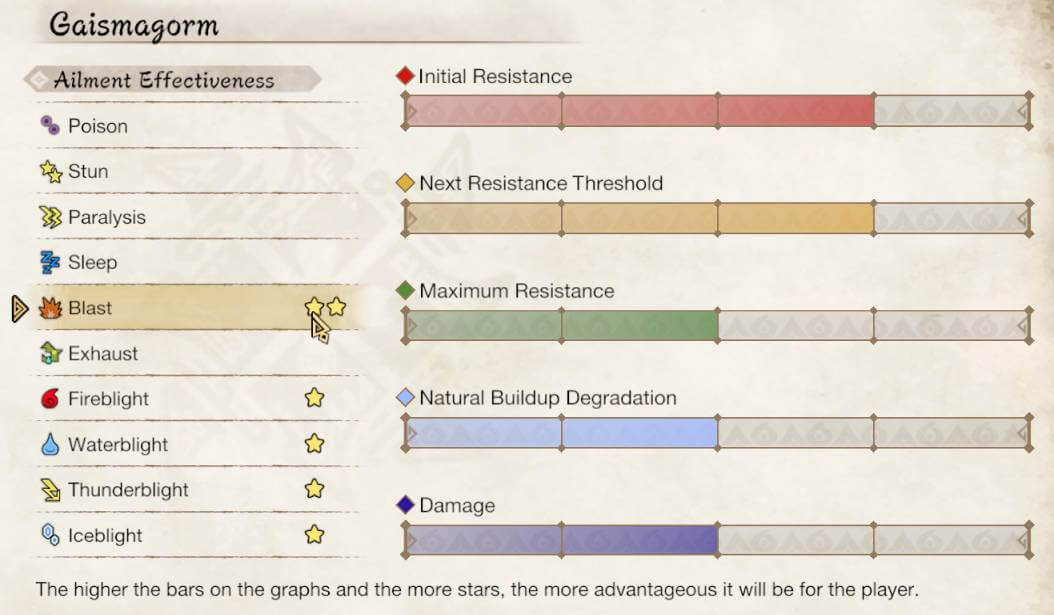
For status ailments, best bring Blast weapons and continue pummeling Gaismagorm to build up the effects. Other ailments, aside from Sleep and Exhaust, work but at a limited degree.
Read our other guides for Monster Hunter Rise Sunbreak here: